Renderwow

Are you an After Effects user? If so, Resolve 15 added Fusion pages to support animation processing. However, Resolve operates on nodes instead of layers. This will leave some AE users may need some time to adapt. We have five techniques, to deal with the problems you may encounter when operating Da Vinci 15.

1.Adding a dynamic title from the clip page
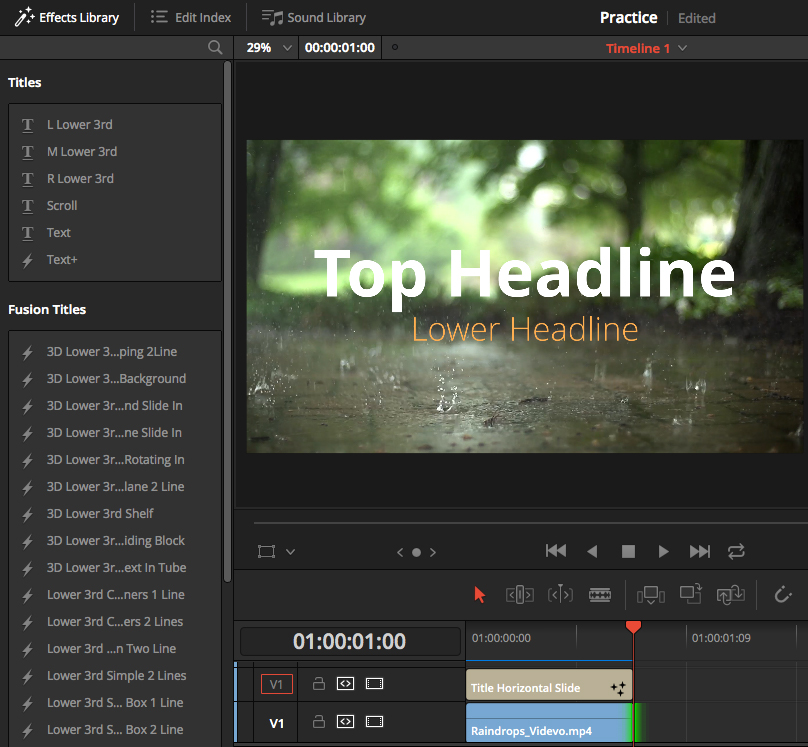
Adding text titles is often used to create new layers, or to create the following 1/3 headings. Resolve 15 adds the Fusion title to the effect library. Find your favorite Fusion title and drag the title onto the timeline. Then, you can change the title from the inspector panel(Similar to the "effect control" panel in AE), the Fusion Title icon will be displayed in the timeline.
2. The use of Fusion pages
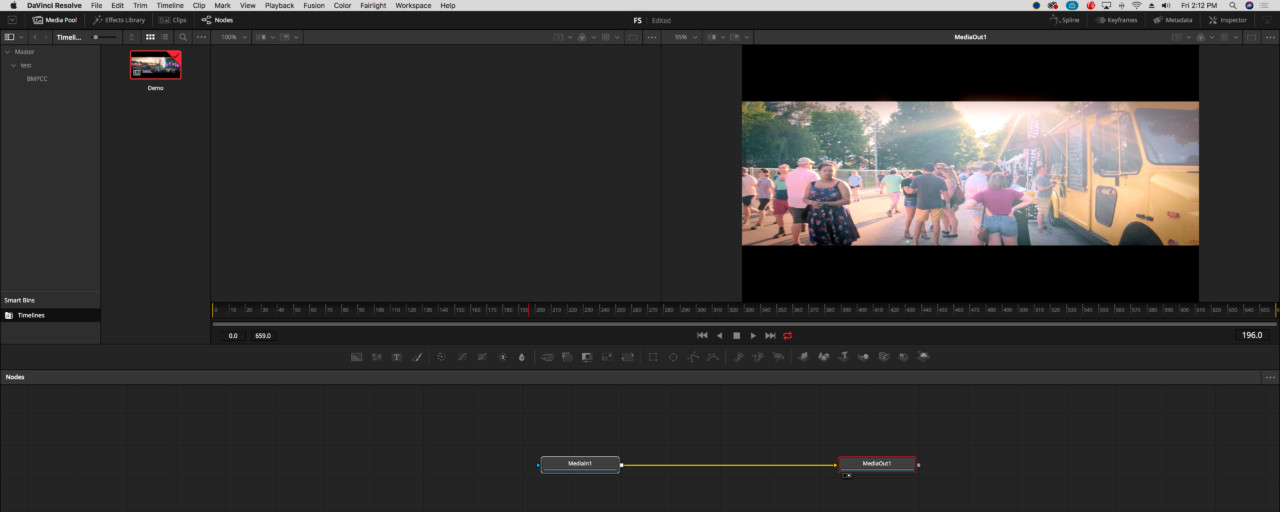
When you click the Fusion page, you will see the Media In node and the Media Out node. Media In is the input material in the clip page, Media Out is the output material for the Fusion page.
Resolve 15 has an integrated timeline, so whatever you do in Fusion, it can be found in Edit, Color, Fairlight and Delivery pages. The most important thing in Fusion is that you are connected to the Media Out node, otherwise, you can't see anything in any page.

3. Page appearance and node logic
When AE works by combining the layers together, Fusion connects nodes in flowcharts or processes. Like AE, you can type in the material, tracking and stabilizing material, and use expressions and create dynamic graphics.
The Fusion page has 4 parts, on the left is the media pool and the effect library, there are 2 viewers on the top, the bottom is the working area, the right is the inspector. You can create a node tree in the node editor, it forms workspaces together with spline curves and key frame editors. By default, you will see the "node editor" at the bottom, and the "spline" and "keyframe editor" will be closed.
4. The toolbar allows you to quickly add common nodes
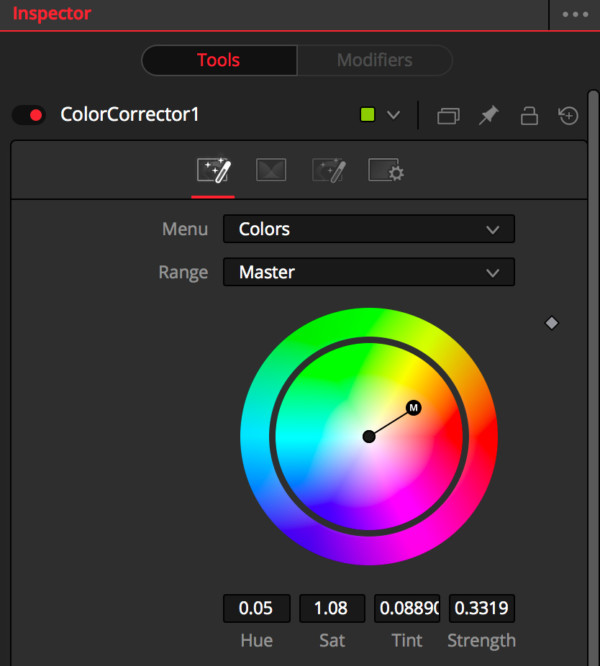
The toolbar above the node editor allows you to add common nodes, such as text and mask. Parsing to call these node tools, even more tools can be found in the effect library. Let's add a color corrector, see how it works. Ensure that Media In1 is selected, then click the color corrector icon in the toolbar, Color Correction1 appears between 2 media nodes, you can modify the color correction settings in the checker.
5. Using the basic knowledge of the node
What is transformation (scale, rotation, etc.) or the effect in AE (color correction, fuzziness, etc.) is called a tool in fusion, you can create separate nodes for each tool you want to add. therefore, if you want to add a color corrector, transform (resize) and fuzzy tools, you need to add 3 nodes.
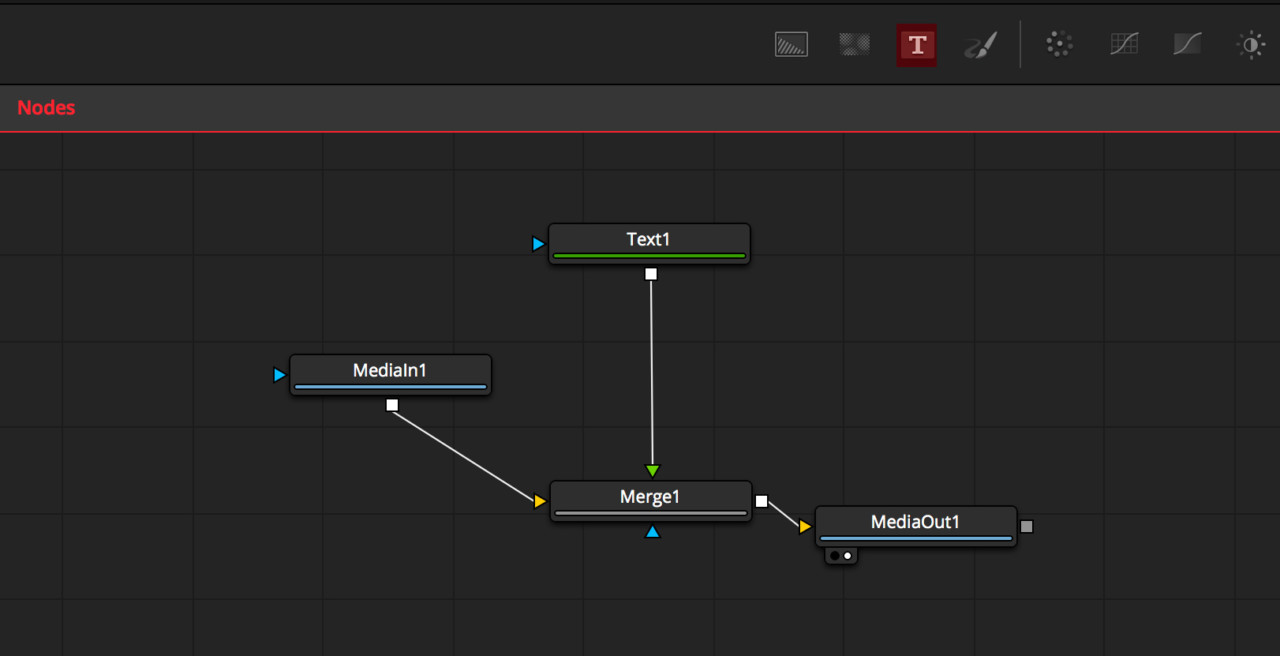
We must use the merging node to connect 2 clips or to connect the clips to text, to see how it works, you can add text to the clip. Select the MediaIn1 node, then click the text Icon in the shortcut menu. the 2 clips are automatically connected to the Merge 1 node, the text is the foreground (top), MediaIn1 is the background (at the bottom). If you want to connect to another clip, another merge node is needed, because the merging node has only 3 inputs (foreground, background and effect mask).
To make the node tree not confused, please select the node and rename the node by F2. this is particularly important for a complex node tree, so you can understand the operation that each node is performing.
